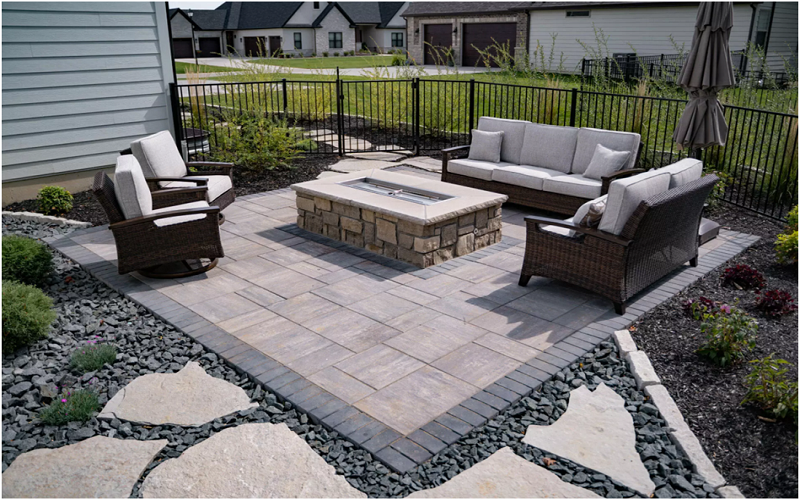
A stunning patio made of pavers is a DIY project that can enhance the appeal of your outdoor area and add value to your home. This step-by-step guide will help you get started on this exciting project.
Materials and Tools Needed
Gather the following materials before you start:
- Pavers
- Gravel
- Sand
- Edging
- Landscape fabric
- Stakes, string, and other materials
- Shovel
- Rake
- Plate Compactor (optional, but recommended)
- Level
- Rubber mallet
- Broom
Step 1: Planning & Designing
Plan and design your patio. Decide on the size, location, and shape. Mark the area with stakes and strings. Draw a detailed plan on paper and measure the dimensions. This plan will guide you through the process.
Step 2: Excavation
Excavate to a depth of about 7-9 inches. This includes space for the pavers, sand, and base material. Ensure the area is level. For larger projects, you can rent a small digger or use a shovel. Remove all debris and roots.
Step 3: Prepare the Base
Lay landscape fabric at the bottom to prevent weeds. Add a layer of gravel 4-6 inches thick. Spread the gravel evenly and compact it with a plate compactor. This base provides stability and drainage for your patio.
Step 4: Add Sand
Add a 1-inch thick layer of sand over the compacted gravel. Spread the sand with a rake and drag a board or piece of wood across it to ensure a smooth, even surface.
Step 5: Laying Pavers
Start laying the pavers from one corner, ideally the closest to your home or a fixed structure. Place each paver tightly against the next one, making sure they are aligned and level. Tap each paver gently into place with a rubber mallet. Leave a small gap between pavers for sand later.
Step 6: Edging
Install edging along the perimeter of the patio to hold the pavers in place. Stake the edging to ensure it is flush with the paver surface.
Step 7: Filling in the Gaps
Once all the pavers are laid, spread sand over the patio. Sweep sand into the gaps between pavers using a broom. The sand will help stabilize the patio. Lightly wet the surface to settle the sand, then add more sand if needed.
Step 8: Finishing Touches
Check for any uneven pavers and make adjustments as necessary. Sweep off excess sand to clean the patio surface. Allow the patio to set for a couple of days before placing heavy furniture.
Follow these steps to create a durable and beautiful paver patio that transforms your outdoor space into a functional and inviting area. Enjoy your new patio for entertaining, relaxing, and enjoying the outdoors!
This post was written by a professional at Reliable Hardscapes. Reliable Hardscapes, led by owner Blake with over 15 years of experience, specializes in transforming outdoor spaces with exceptional hardscaping services. We proudly serve Hillsborough, Pinellas, Manatee, and Sarasota counties, offering a comprehensive range of services including pavers, outdoor Kitchens Palmetto FL, stone patios, retaining walls, gated entryways, outdoor fireplaces, creek beds, driveways, fences, and even excavation and interior remodeling. At Reliable Hardscapes, we are dedicated to enhancing your property’s beauty and functionality with our expert craftsmanship and personalized service.